- 浏览: 952410 次
-

文章分类
最新评论
Android中GridView拖拽的效果【android进化三十六】
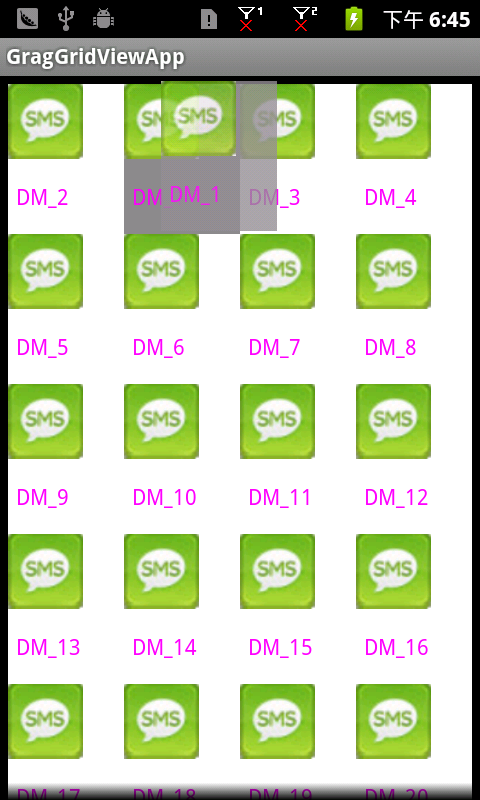
最近看到联想,摩托罗拉等,手机launcher中有个效果,进入mainmenu后,里面的应用程序的图标可以拖来拖去,所以我也参照网上给的代码,写了一个例子。还是很有趣的,实现的流畅度没有人家的那么好,我只是模仿这种效果,我写的这个拖拽是两个图标之间进行交换,所以,当从一行的某个位置,换到下一行的另一列的时候,发现有好几个图标都改变位置了,因为是相邻两个交换位置,所以每经过相邻的图标的时候都改变位置。先弄个雏形,以后再更新优化。
转载请标明出处:http://blog.csdn.net/wdaming1986/article/details/7436881
先看几张效果图,再来研究代码:
横行拖拽:
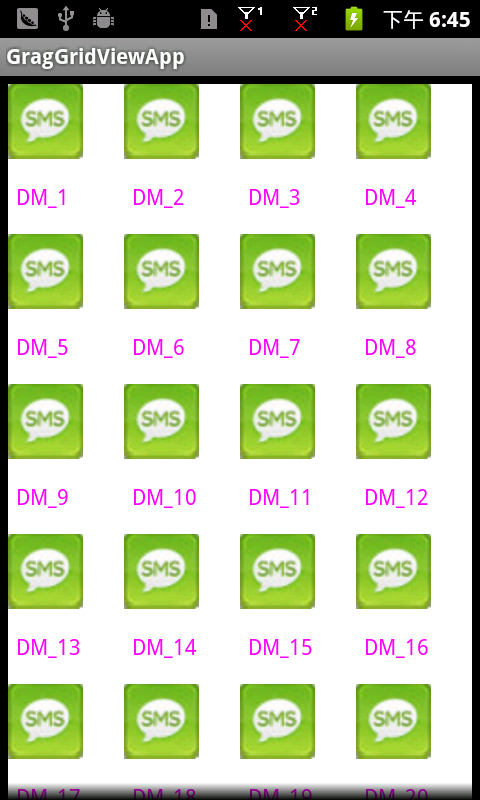
纵向拖拽的效果图:


下面贴上代码---->在GragGridViewApp-4-7这个工程里面:
1、在包com.cn.daming.adapter中,有三个类----->
1.1、DragAdapter.java这个类中的代码如下:
package com.cn.daming.adapter;

import java.util.ArrayList;
import java.util.Collections;

import android.content.Context;
import android.view.View;
import android.view.ViewGroup;
import android.widget.BaseAdapter;

public abstract class DragAdapter extends BaseAdapter {

	protected Context mContext;
	protected ArrayList<DragMessage> mlist;

	public DragAdapter(Context mContext, ArrayList<DragMessage> mlist) {
		this.mContext = mContext;
		this.mlist = mlist;
	}

	public int getCount() {
	    if (this.mlist != null) {
	        return this.mlist.size();
	    }
		return 0;
	}

	public DragMessage getItem(int position) {
		return (DragMessage)this.mlist.get(position);
	}

	public long getItemId(int position) {
		return 0;
	}

	 public void addMsg(DragMessage msg){
	    this.mlist.add(msg);
	 }

	 final void reFlag(){
	    for (DragMessage msg : this.mlist) {
	      msg.flag = 0;
	    }
	    notifyDataSetChanged();
	 }

	 final void swap(int srcPosition, int dragPosition){
	    Collections.swap(this.mlist, srcPosition, dragPosition);
	    notifyDataSetChanged();
	 }

	 final void setFlag(int position, int flag){
	    getItem(position).flag = flag;
	    notifyDataSetChanged();
	 }

	public abstract View getView(int position, View convertView, ViewGroup parent);

}
1.2、DragMessage.java这个类中的代码如下:
package com.cn.daming.adapter;

public class DragMessage {
	 public static final int MOVE_FLAG = 1;
	 public static final int STATIC_FLAG = 0;
	 public int flag = 0;
}
1.3、GragGridView.java核心类中的代码如下:
package com.cn.daming.adapter;

import android.content.Context;
import android.graphics.Bitmap;
import android.graphics.Color;
import android.graphics.PixelFormat;
import android.graphics.drawable.Drawable;
import android.os.Handler;
import android.os.Looper;
import android.os.Message;
import android.util.AttributeSet;
import android.util.Log;
import android.view.Gravity;
import android.view.MotionEvent;
import android.view.View;
import android.view.ViewGroup;
import android.view.WindowManager;
import android.widget.AdapterView;
import android.widget.GridView;
import android.widget.ImageView;

public class GragGridView extends GridView{

	private ImageView dragImageView;//拖动item的preview
	private WindowManager windowManager;
	private WindowManager.LayoutParams windowParams;
	private int dragSrcPosition; //开始拖拽的位置
	private int dragPosition;    // 结束拖拽的位置
	private int dragPointX;//相对于item的x坐标
	private int dragPointY;//相对于item的y坐标
	private int dragOffsetX;
	private int dragOffsetY;
	private int dragImageId;
	private int itemHeight;
	private int itemWidth;
	private int moveHeight = 0;
	private int upScrollBounce;
	private int downScrollBounce;
	private int dragColor = Color.GRAY;

	private int changePosition = -1;
	private long scrollDelayMillis = 10L;

	private int middleX;
	private int middleY;
	private boolean isDrag = false;

	private RefreshHandler scrollDelayUp = new RefreshHandler(Looper.getMainLooper(), true);
	private RefreshHandler scrollDelayDown = new RefreshHandler(Looper.getMainLooper(), false);

	private int scrollHeight = 4;
	private int maxSH = 20;
	private int minSH = 4;

    public void setMoveHeight(int height) {
	    this.moveHeight = height;
	}

    public void setDragColor(int color) {
      this.dragColor = color;
    }

	public void setDragImageId(int id) {
	    this.dragImageId = id;
	}

	public GragGridView(Context context, AttributeSet attrs) {
		super(context, attrs);
	}

	@Override
	public boolean onInterceptTouchEvent(MotionEvent ev) {

		if (ev.getAction() == MotionEvent.ACTION_DOWN) {
			int x = (int)ev.getX();
			int y = (int)ev.getY();

			this.dragSrcPosition = this.dragPosition = pointToPosition(x, y);
			if (this.dragPosition == -1) {
		        return super.onInterceptTouchEvent(ev);
		    }
			ViewGroup itemView = (ViewGroup)getChildAt(this.dragPosition -
				        getFirstVisiblePosition());
			//得到当前点在item内部的偏移量 即相对于item左上角的坐标
			this.itemHeight = itemView.getHeight();
			this.dragPointX = (x - itemView.getLeft());
		    this.dragPointY = (y - itemView.getTop());
		    this.dragOffsetX = (int)(ev.getRawX() - x);
		    this.dragOffsetY = (int)(ev.getRawY() - y);
		    View dragger = itemView.findViewById(this.dragImageId);
		    if ((dragger != null) && (x > dragger.getLeft()&& x < dragger.getRight()) &&
		    		(y > dragger.getTop() && y < dragger.getBottom())) {
		    	if(this.moveHeight <= 0 || (this.moveHeight >= getHeight()/2)) {
		    		this.upScrollBounce = (getHeight() / 3);
		            this.downScrollBounce = (getHeight() * 2 / 3);
		    	} else {
		    		this.upScrollBounce = this.moveHeight;
		            this.downScrollBounce = (getHeight() - this.moveHeight);
		    	}

		    	//解决问题3
		    	//每次都销毁一次cache,重新生成一个bitmap
		    	itemView.destroyDrawingCache();
		    	itemView.setDrawingCacheEnabled(true);
		        Drawable background = itemView.getBackground();
		        itemView.setBackgroundColor(this.dragColor);
		        Bitmap bitmap = Bitmap.createBitmap(itemView.getDrawingCache());
		        itemView.setBackgroundDrawable(background);
		        //建立item的缩略图
		        startDrag(bitmap, x, y);
		    }
		    return false;
		}
		return super.onInterceptTouchEvent(ev);
	}


	@Override
	public boolean onTouchEvent(MotionEvent ev) {

		if ((this.dragImageView != null) && (this.dragPosition != -1)) {
			int action = ev.getAction();
			 int moveY = (int)ev.getY();
		     int moveX = (int)ev.getX();
			switch(action) {
			      case MotionEvent.ACTION_UP:
			    	    int upX = (int)ev.getX();
			    	    int upY = (int)ev.getY();
			    	    stopDrag();
			    	    onDrop(upX, upY);
		                break;
		          case MotionEvent.ACTION_MOVE:
				        if (moveX <= 0)
					      this.middleX = 0;
					    else if (moveX >= getWidth())
					      this.middleX = getWidth();
					    else {
					      this.middleX = moveX;
					    }

				        if (moveY <= 0)
				          this.middleY = 0;
				        else if (moveY >= getHeight())
				          this.middleY = getHeight();
				        else {
				          this.middleY = moveY;
				        }
				        dragPositionChanged();
				        onDrag(moveX, moveY);
			}
			return true;
		}
		return super.onTouchEvent(ev);
	}

	private void onDrag(int x, int y) {
		if (this.dragImageView != null) {
			this.windowParams.alpha = 0.8F;

			if (this.middleX - this.dragPointX <= 0)
		        this.windowParams.x = this.dragOffsetX;
		    else if (this.middleX - this.dragPointX >= getWidth() - this.itemWidth)
		        this.windowParams.x = (getWidth() - this.itemWidth + this.dragOffsetX);
		    else {
		        this.windowParams.x = (this.middleX - this.dragPointX + this.dragOffsetX);
		    }

			if (this.middleY - this.dragPointY <= 0)
		        this.windowParams.y = this.dragOffsetY;
		    else if (this.middleY - this.dragPointY >= getHeight() - this.itemHeight)
		        this.windowParams.y = (getHeight() - this.itemHeight + this.dragOffsetY);
		    else {
		        this.windowParams.y = (this.middleY - this.dragPointY + this.dragOffsetY);
		    }
			this.windowManager.updateViewLayout(this.dragImageView, this.windowParams);
		}

		int tempPosition = pointToPosition(this.middleX, this.middleY);
		Log.v("daming", "GragGridView ---> 177 tempPosition == "+tempPosition);
	    if (tempPosition != -1) {
	      this.dragPosition = tempPosition;
	    }

	    if ((y >= this.upScrollBounce) && (y <= this.downScrollBounce)) {
	        this.isDrag = false;
	        return;
	    }

	    if (y < this.upScrollBounce) {
	        float a = this.upScrollBounce - this.middleY;
	        float b = this.upScrollBounce;
	        float c = a / b;
	        this.scrollHeight = (int)(c * (this.maxSH - this.minSH) + this.minSH);
	        this.isDrag = true;
	        this.scrollDelayUp.sleep(0L);
	    } else if (y > this.downScrollBounce) {
	        float a = this.middleY - this.downScrollBounce;
	        float b = this.upScrollBounce;
	        float c = a / b;
	        this.scrollHeight = (int)(c * (this.maxSH - this.minSH) + this.minSH);
	        this.isDrag = true;
	        this.scrollDelayDown.sleep(0L);
	    }
	}

	private void startDrag(Bitmap bm, int x, int y) {
		stopDrag();

		this.windowParams = new WindowManager.LayoutParams();
		//Gravity.TOP|Gravity.LEFT;这个必须加
		this.windowParams.gravity = Gravity.TOP|Gravity.LEFT;
		//得到preview左上角相对于屏幕的坐标
	    this.windowParams.x = (x - this.dragPointX + this.dragOffsetX);
	    this.windowParams.y = (y - this.dragPointY + this.dragOffsetY);

	    //设置拖拽item的宽和高
	    this.windowParams.width = WindowManager.LayoutParams.WRAP_CONTENT;
	    this.windowParams.height = WindowManager.LayoutParams.WRAP_CONTENT;
	    this.windowParams.flags = WindowManager.LayoutParams.FLAG_NOT_FOCUSABLE
	                         | WindowManager.LayoutParams.FLAG_NOT_TOUCHABLE
	                         | WindowManager.LayoutParams.FLAG_KEEP_SCREEN_ON
	                         | WindowManager.LayoutParams.FLAG_LAYOUT_IN_SCREEN;
	    this.windowParams.format = PixelFormat.TRANSLUCENT;
	    this.windowParams.windowAnimations = 0;

	    ImageView imageView = new ImageView(getContext());
	    imageView.setImageBitmap(bm);
	    this.windowManager = ((WindowManager)getContext().getSystemService(Context.WINDOW_SERVICE));//“window”
	    this.windowManager.addView(imageView, this.windowParams);
	    this.dragImageView = imageView;
	}

	private void stopDrag() {
	   if (this.dragImageView != null) {
	      this.windowManager.removeView(this.dragImageView);
	      this.dragImageView = null;
	   }
	   this.changePosition = -1;
	   this.isDrag = false;
	}

	private void dragPositionChanged(){
	    DragAdapter adapter = (DragAdapter)getAdapter();
	    if (this.changePosition != this.dragPosition) {
	      if (this.changePosition == -1)
	      {
	        this.changePosition = this.dragPosition;
	        adapter.setFlag(this.changePosition, 1);
	        return;
	      }

	      adapter.swap(this.changePosition, this.dragPosition);

	      this.changePosition = this.dragPosition;
	    }
	}

	public void setMaxSH(int sh){
	    this.maxSH = sh;
	}

	public void setMinSH(int sh){
	    this.minSH = sh;
	}

	private void onDrop(int x, int y){
		//为了避免滑动到分割线的时候,返回-1的问题
		int tempPosition = pointToPosition(x, y);
		if(tempPosition!=INVALID_POSITION){
			dragPosition = tempPosition;
		}
		//超出边界处理
		if(y<getChildAt(0).getTop()){
			//超出上边界
			dragPosition = 0;
		}else if(y>getChildAt(getChildCount()-1).getBottom()||
				(y>getChildAt(getChildCount()-1).getTop()&&x>getChildAt(getChildCount()-1).getRight())){
			//超出下边界
			dragPosition = getAdapter().getCount()-1;
		}

		//数据交换
		if(dragPosition!=dragSrcPosition&&dragPosition>-1&&dragPosition<getAdapter().getCount()){
			DragAdapter adapter = (DragAdapter)getAdapter();
			adapter.reFlag();
		}

//	    DragAdapter adapter = (DragAdapter)getAdapter();
//	    adapter.reFlag();
	}

	private void actDown(){
	    int tempPosition = pointToPosition(this.middleX, this.middleY);
	    if (tempPosition != AdapterView.INVALID_POSITION) {
	      this.dragPosition = tempPosition;
	    }
	    dragPositionChanged();
	}

	private void actUp(){
	  int tempPosition = pointToPosition(this.middleX, this.middleY);
	  if (tempPosition != AdapterView.INVALID_POSITION) {
	    this.dragPosition = tempPosition;
	  }
	  dragPositionChanged();
	}

	class RefreshHandler extends Handler {
		boolean isUp;

		 public RefreshHandler(Looper looper, boolean isUp){
		      super(looper);
		      this.isUp = isUp;
		 }

		 public RefreshHandler(Looper l) {
		      super(l);
		 }

		  public void handleMessage(Message msg){
		      if (GragGridView.this.isDrag) {
		        if (this.isUp)
		        	GragGridView.this.actUp();
		        else {
		        	GragGridView.this.actDown();
		        }
		        sleep(GragGridView.this.scrollDelayMillis);
		      }
		  }

		  public void sleep(long delayMillis) {
		      sendMessageDelayed(obtainMessage(0), delayMillis);
		  }
	}
}
2、在包com.cn.daming.draggridview中,有两个类---->
2.1、GragGridViewAppActivity.java入口类中的代码:
package com.cn.daming.draggridview;

import java.util.ArrayList;

import android.app.Activity;
import android.content.Context;
import android.graphics.Color;
import android.graphics.drawable.Drawable;
import android.os.Bundle;
import android.view.LayoutInflater;
import android.view.View;
import android.view.ViewGroup;
import android.widget.ImageView;
import android.widget.TextView;

import com.cn.daming.adapter.DragAdapter;
import com.cn.daming.adapter.DragMessage;
import com.cn.daming.adapter.GragGridView;

public class GragGridViewAppActivity extends Activity {

	private MyAdapter myAdapter;
	private ArrayList<DragMessage> mlist = new ArrayList<DragMessage>();
	private GragGridView mGridView;

	@Override
    public void onCreate(Bundle savedInstanceState) {
        super.onCreate(savedInstanceState);
        setContentView(R.layout.drag_grid_activity);
        initDate();
        mGridView = (GragGridView)findViewById(R.id.drag_grid);
        myAdapter = new MyAdapter(this, mlist);
        mGridView.setAdapter(myAdapter);
        //设置触发拖动的区域,用一个ImageView来设置,这个必须设置
        mGridView.setDragImageId(R.id.grag_grid_item_view);
        //以下这些都做了相应的处理,不设置没关系,而且效果也不错
        //设置拖动浮项的背景色
//      mListView.setDragColor(Color.RED);
        //设置滚动的最大像素
//      mListView.setMaxSH(sh);
        //设置滚动的最小像素
//      mListView.setMinSH(sh);
        //设置滚动区的高度(2*height应该小于ListView自己的高度)
//      mListView.setMoveHeight(height);
    }

	private void initDate(){
    	for (int i = 1; i <= 100; i++) {
			MyMessage msg = new MyMessage();
			String str = "DM_" + i;
			msg.msg = str;
			mlist.add(msg);
		}
    }

    class MyAdapter extends DragAdapter{

    	Drawable background;

		public MyAdapter(Context mContext, ArrayList<DragMessage> mlist) {
			super(mContext, mlist);
		}

		@Override
		public View getView(int position, View convertView, ViewGroup parent) {
			View view = convertView;
			ViewHolder holder = null;
			if (view == null) {
				view = LayoutInflater.from(mContext).inflate(
						R.layout.drag_grid_item, null);
				holder = new ViewHolder();
				holder.tv = (TextView) view
						.findViewById(R.id.drag_grid_item_text);
				holder.iv = (ImageView) view
				        .findViewById(R.id.drag_grid_item_image);
				view.setTag(holder);
			} else {
				holder = (ViewHolder) view.getTag();
			}
			holder.tv.setText(((MyMessage)getItem(position)).msg);
			holder.iv.setBackgroundResource(R.drawable.title2);
			if(background == null){
				background = view.getBackground();}
			if(getItem(position).flag == DragMessage.MOVE_FLAG){
				view.setBackgroundColor(Color.GRAY);
			}
			else{
				view.setBackgroundDrawable(background);
			}

			return view;
		}

    }
    private class ViewHolder {
		TextView tv;
		ImageView iv;
	}
}
2.2、MyMessage.java中的代码:
package com.cn.daming.draggridview;

import com.cn.daming.adapter.DragMessage;

public class MyMessage extends DragMessage{
	public String msg;
}
3、布局文件layout有两个----->
3.1、drag_grid_activity.xml中的代码如下:
<?xml version="1.0" encoding="utf-8"?>
<LinearLayout xmlns:android="http://schemas.android.com/apk/res/android"
    android:layout_width="fill_parent"
    android:layout_height="fill_parent"
    android:orientation="vertical" >

<com.cn.daming.adapter.GragGridView
       android:id="@+id/drag_grid"
       android:layout_width="fill_parent"
       android:layout_height="fill_parent"
       android:numColumns="auto_fit"
       android:columnWidth="70dp"
       android:stretchMode="columnWidth"
       android:gravity="center"
       android:layout_gravity="center"
       android:cacheColorHint="#00000000"/>
</LinearLayout>
3.2、drag_grid_item.xml中的代码如下:
<?xml version="1.0" encoding="utf-8"?>
<!-- 一定要使用相对布局 -->
<RelativeLayout xmlns:android="http://schemas.android.com/apk/res/android"
	android:background="#FFFFFF"
	android:id="@+id/grag_grid_item_view"
    android:layout_width="fill_parent"
    android:layout_height="fill_parent">
    <TextView
       android:id="@+id/drag_grid_item_text"
       android:layout_width="wrap_content"
       android:layout_height="50dp"
       android:paddingLeft="5dip"
       android:gravity="center"
       android:textColor="#ffff00ff"
       android:layout_below="@+id/drag_grid_item_image"
       android:capitalize="none"
    />
    <ImageView
       android:id="@+id/drag_grid_item_image"
       android:layout_width="50dp"
       android:layout_height="50dp"
       android:scaleType="center"
     />
</RelativeLayout>
有问题的可以留言,欢迎大家来讨论研究,分享知识,共同进步!
以下是我在开发中遇到问题的参考资料:
http://www.cnblogs.com/qianxudetianxia/archive/2011/06/19/2084886.html
http://lipeng88213.iteye.com/blog/1099621
http://hi.baidu.com/jwq359699768/blog/item/f2caee8741e71131c75cc369.html
源代码下载地址:http://download.csdn.net/detail/wdaming1986/4207350


发表评论

相关推荐
4.2.15 拖动效果(Gallery) 4.2.16 切换图片(hmgeSwilcher) 4.2.17 网格视图(GridView) 4.2.18 卷轴视图(ScrollView) 4.2.19 进度条(ProgressBar) 4.2.20 拖动条(SeekBar) 4.2.21 状态栏提示(Notification、...
4.2.15 拖动效果(Gallery) 4.2.16 切换图片(hmgeSwilcher) 4.2.17 网格视图(GridView) 4.2.18 卷轴视图(ScrollView) 4.2.19 进度条(ProgressBar) 4.2.20 拖动条(SeekBar) 4.2.21 状态栏提示...
Google Android SDK开发范例大全(完整版)共4个分卷 目录 第1章 了解.深入.动手做. 1.1 红透半边天的Android 1.2 本书目的及涵盖范例范围 1.3 如何阅读本书 1.4 使用本书范例 1.5 参考网站 第2章 Android初体验 2.1...
Google Android SDK开发范例大全(完整版)共4个分卷 目录 第1章 了解.深入.动手做. 1.1 红透半边天的Android 1.2 本书目的及涵盖范例范围 1.3 如何阅读本书 1.4 使用本书范例 1.5 参考网站 第2章 Android初体验 2.1...
Google Android SDK开发范例大全(完整版)共4个分卷 目录 第1章 了解.深入.动手做. 1.1 红透半边天的Android 1.2 本书目的及涵盖范例范围 1.3 如何阅读本书 1.4 使用本书范例 1.5 参考网站 第2章 Android初体验 2.1...
3.15 如iPhone拖动相片特效——Gallery画廊 3.16 自制计算器——多按钮的整合应用 3.17 关于(About)程序信息——Menu功能菜单程序设计 3.18 程序加载中,请稍后——ProgressDialog与线程整合应用 3.19 全屏幕以按钮...
Google Android SDK开发范例大全(完整版) 包含部分书中源码 目录 第1章 了解.深入.动手做. 1.1 红透半边天的Android 1.2 本书目的及涵盖范例范围 1.3 如何阅读本书 1.4 使用本书范例 1.5 参考网站 第2章 ...
Google Android SDK开发范例大全 目录 第1章 了解.深入.动手做. 1.1 红透半边天的Android 1.2 本书目的及涵盖范例范围 1.3 如何阅读本书 1.4 使用本书范例 1.5 参考网站 第2章 Android初体验 2.1 安装AndroidSDK与...
Google Android SDK开发范例大全 目录 第1章 了解.深入.动手做. 1.1 红透半边天的Android 1.2 本书目的及涵盖范例范围 1.3 如何阅读本书 1.4 使用本书范例 1.5 参考网站 第2章 Android初体验 2.1 安装AndroidSDK与...
1.1 红透半边天的Android 1.2 本书目的及涵盖范例范围 1.3 如何阅读本书 1.4 使用本书范例 1.5 参考网站 第2章 Android初体验 2.1 安装AndroidSDK与ADTplug-in 2.2 建立第一个Android项目(HelloAndroid!...
3.15 如iPhone拖动相片特效——Gallery画廊 3.16 自制计算器——多按钮的整合应用 3.17 关于(About)程序信息——Menu功能菜单程序设计 3.18 程序加载中,请稍后——ProgressDialog与线程整合应用 3.19 全屏幕以按钮...
3.15 如iPhone拖动相片特效——Gallery画廊 3.16 自制计算器——多按钮的整合应用 3.17 关于(About)程序信息——Menu功能菜单程序设计 3.18 程序加载中,请稍后——ProgressDialog与线程整合应用 3.19 全屏幕以按钮...